In this lesson we’re going to let a LED blinking.
For that do we need:
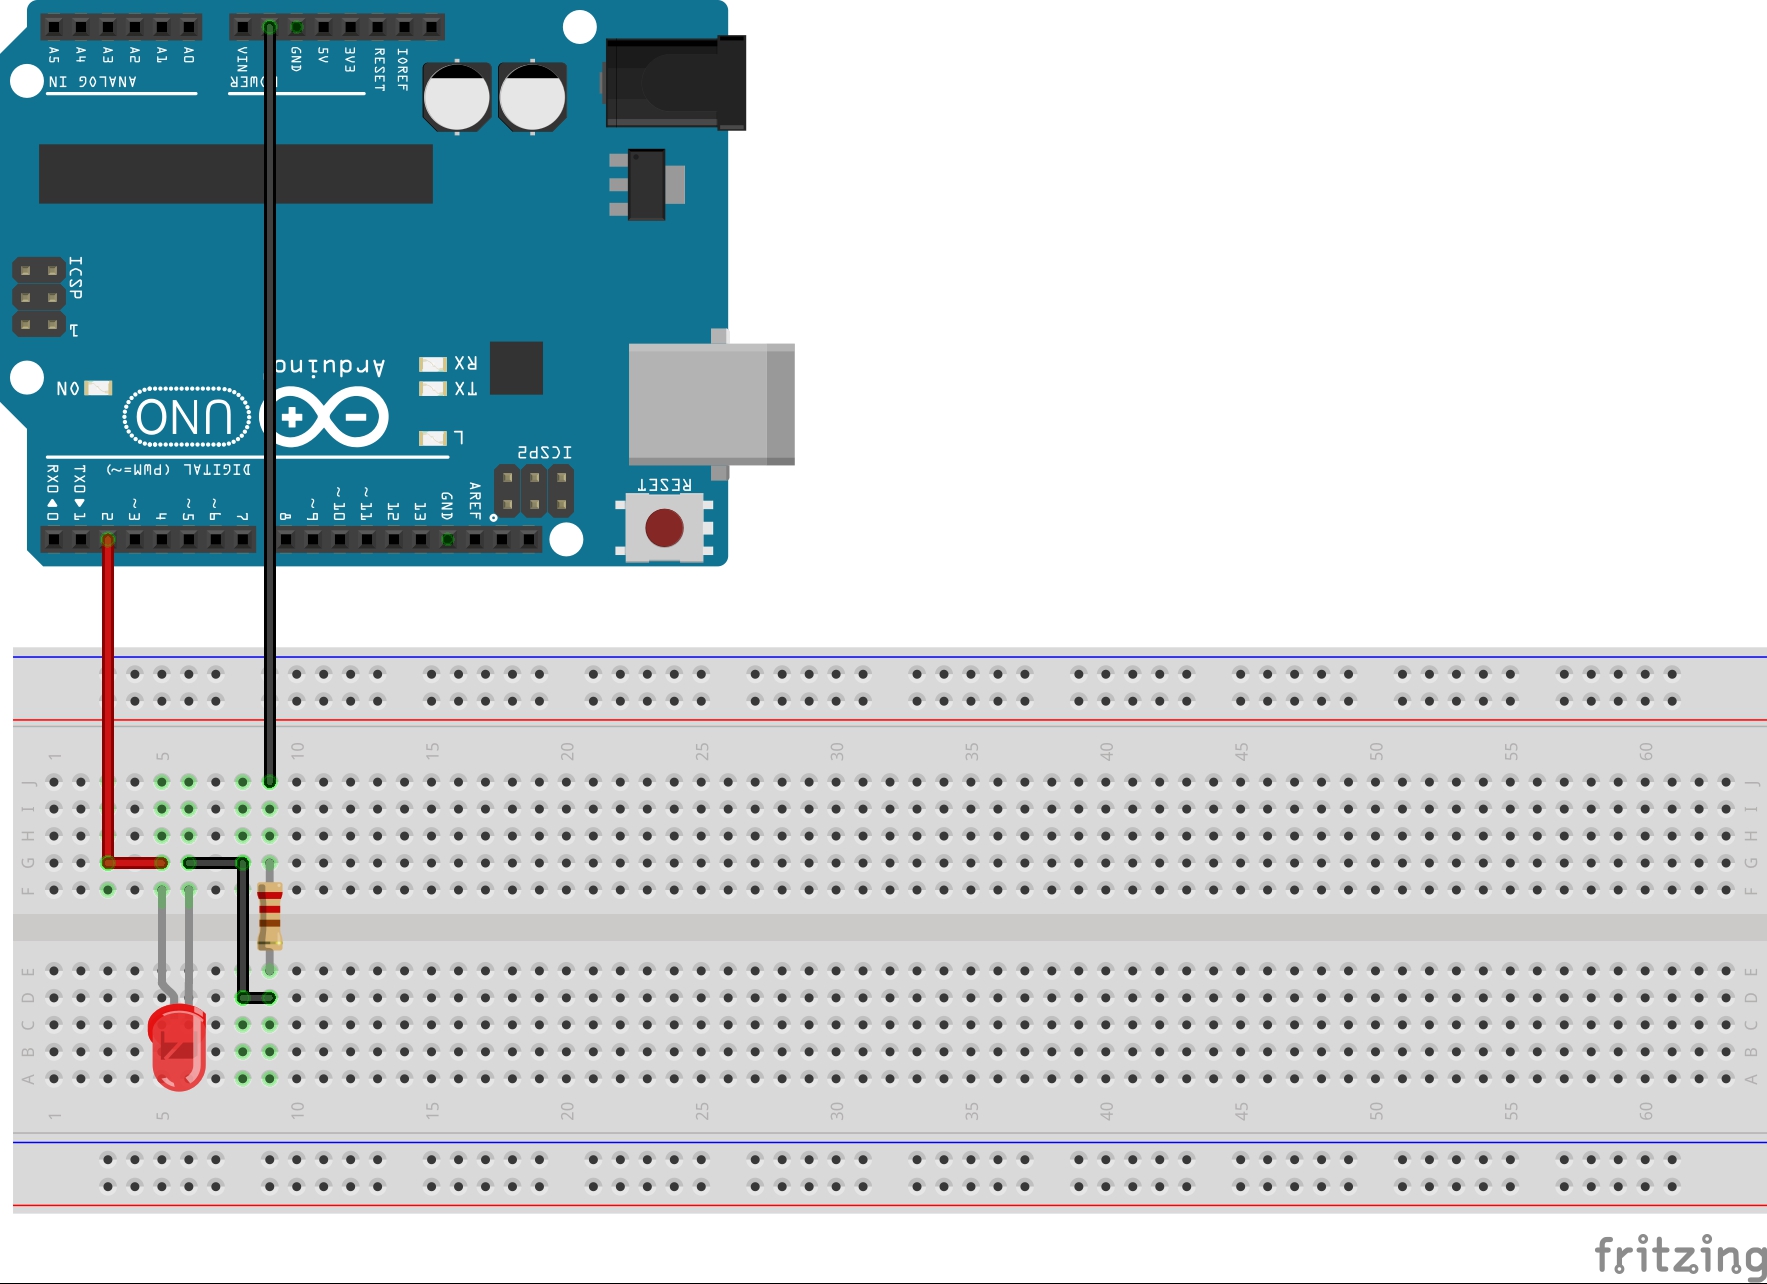
- 1 Arduino
- 1 Breadboard
- 1 LED
- 1 220Ω Resistor
- 3 Wires
Let’s start with the program code.
We have to tell the Arduino, where the LED has been connected. We do that with the command pinMode() in the setup() method. The pinMode() method needs two variable: The pin number and the port type (INPUT / OUTPUT). For our lesson we want to use pin 2 and we set the port type to OUTPUT.
Now we switch to the loop() method. There we define the blinking with digitalWrite() and delay().
For switching the LED on we use digitalWrite(2, HIGH).
For switching the LED off we use digitalWrite(2, LOW).
For the delay we use delay(1000) (you have to set the value in milliseconds -> 1s = 1000ms).
Now we combine these methods in order to flash the LED.
void setup()
{
    pinMode(2, OUTPUT);  //Set Digital I/O 2 as output
}

void loop()
{
    digitalWrite(2, HIGH);  //Set Digital I/O 2 ti ON
    delay(1000);    //Wait for 1000 milliseconds (1 Second)
    digitalWrite(2, LOW);  //Set Digital I/O 2 ti OFF
    delay(1000);    //Wait for 1000 milliseconds (1 Second)
}
To see, what your code is doing, you have to build your circuit. Do it according to the following scheme:
| ⇐ Basics | Lesson #2 ⇒ |