In this lesson we’re going to show messages in a LCD-Display.
For that do we need:
- 1 Arduino
- 1 220Ω Resistor (only for 4-bit displays)
- 1 10kΩ Potentiometer (only for 4-bit displays)
- 1 LCD-Display (with 4-bit or I²C-Connector)
- 16 Wires (different colors are helpful)
Let’s start with the program code.
LCD-Display with a 4-bit-Connector
First we have to import to libraries to the program. We need the Wire.h and the LiquidCrystal.h .
We include with the following command:
#include <Wire.h>
#include <LiquidCrystal.h>
Then we have to initialize the lcd, that the Arduino knows, on which pins the display has been connected.
So we have to define a variable for the display. We do it with the following command:
LiquidCrystal lcd()
LiquidCrystal is the Class, which contains the library for the LCD-Display and lcd() is like an array, which contains the port-numers.
The lcd()-Array needs six integer numbers. The first two are the controller pins for the display and the other four are sending the data to the display.
The you have to go to the setup() method, to setup the display. Here we need our lcd()-Array and we have to use it like a class to tell the display, how many rows and how many columns your display has. We do that with the following command:
lcd.begin(rows, columns)
In our lesson we use 16 rows and 2 columns (standard Arduino display). We also set in the setup()-method the first text. It’s not necessary but it will be better, to see if your display has been initialized correctly. We do it like this: lcd.print("Text")
Now we go to the loop()-method.
We want to make little stop watch, wich shows us in the second line the seconds until the last reset. For that we have to set the cursor to the second line.
We do it like this: lcd.setCursor(row, column)
Then we have to write the text. We also do this with lcd.print() but not directly with a text. We have to do a little arithmetical problem to show the seconds.
For that we use the millis()-method and to show the seconds we have to divide it through thousand.
Now we combine these methods in order to show a text in a LCD-Display.
#include <Wire.h>
#include <LiquidCrystal.h>
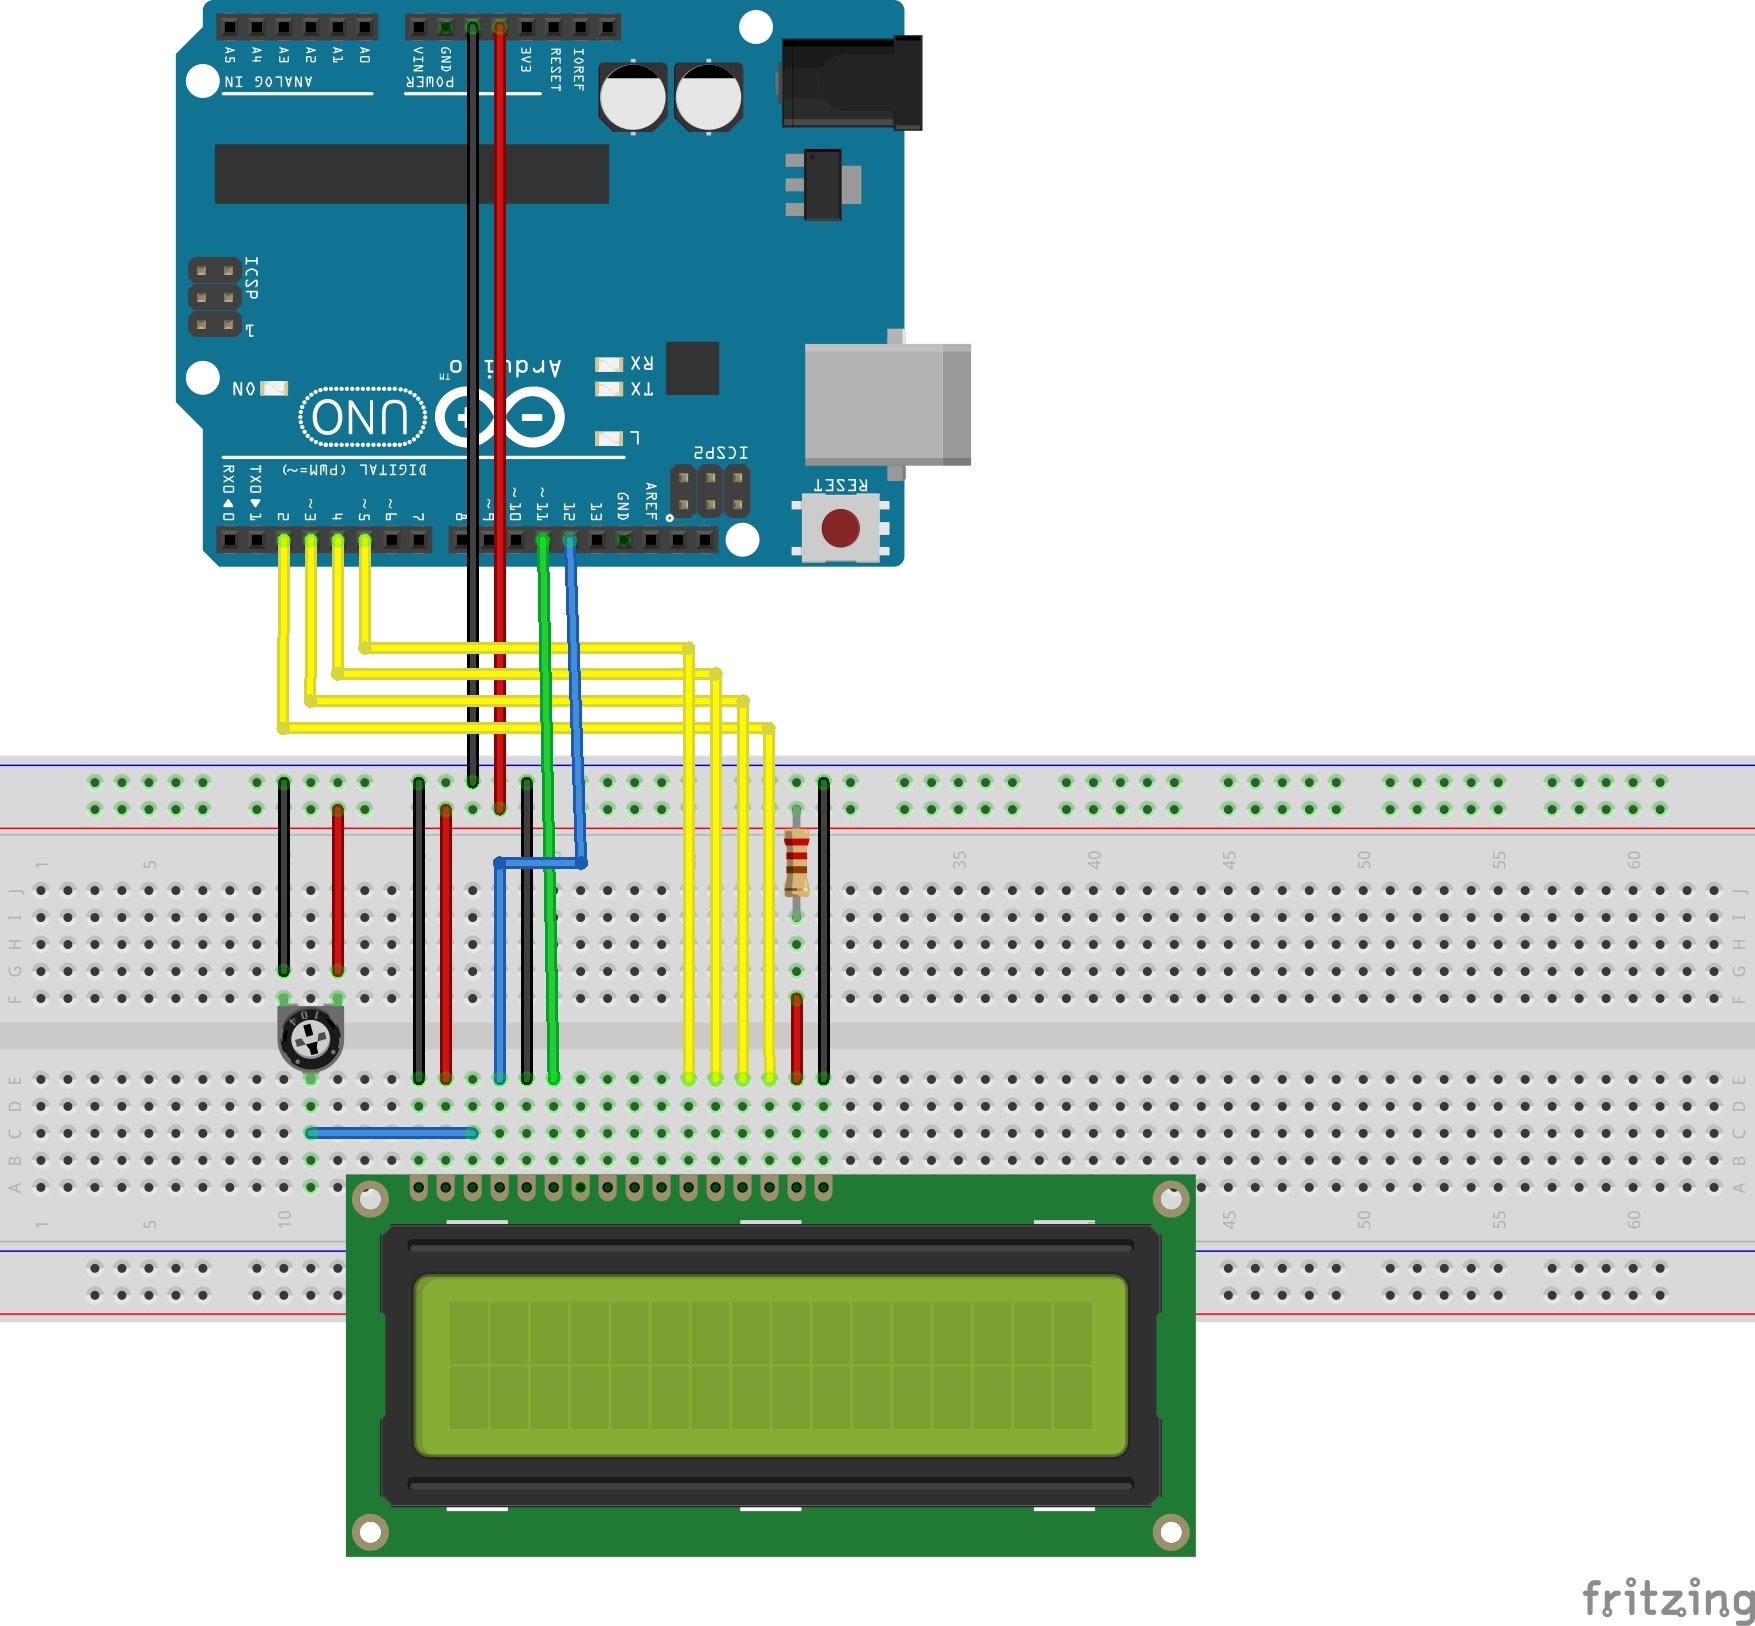
LiquidCrystal lcd(12, 11, 5, 4, 3, 2);
void setup()
{
lcd.begin(16, 2); //Set row and colls of the display
lcd.print("Hello World!");
}
void loop()
{
lcd.setCursor(0,2); //Set the cursor to column 0, line 2
lcd.print(millis()/1000); //Print the number if seconds since the last reset
}
To see, what your code is doing, you have to build your circuit. Do it according to the following scheme:
LCD-Display with an I²C-Connector
First we have to import to libraries to the program. We need the Wire.h and the LiquidCrystal.h .
We include with the following command:
#include <Wire.h>
#include <LiquidCrystal.h>

#include <LiquidCrystal_I2C.h>

#include <LCD.h>
Then we have to initialize the lcd, that the Arduino knows, what it has to do and wich id the display has.
So we have to define a variable for the display. We do it with the following command:
LiquidCrystal_I2C lcd(0x27, 2, 1, 0, 4, 5, 6, 7, 3, POSITIVE)
#include <Wire.h>
#include <LiquidCrystal.h>
#include <LiquidCrystal_I2C.h>
#include <LCD.h>
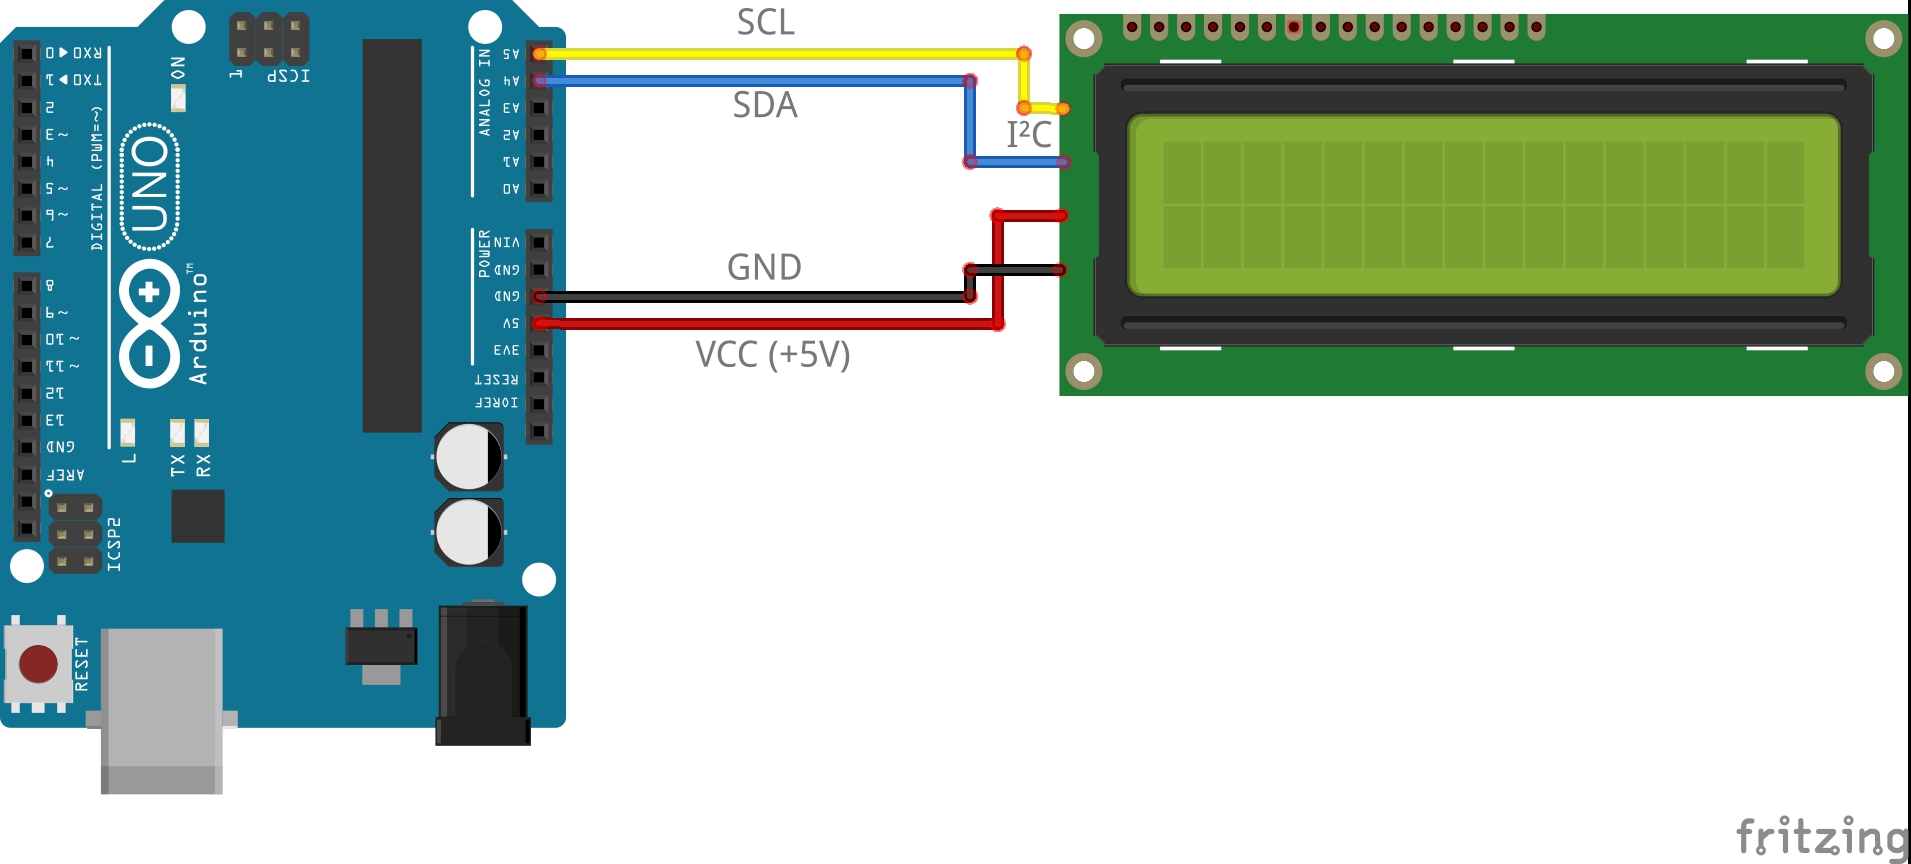
LiquidCrystal_I2C lcd(0x27, 2, 1, 0, 4, 5, 6, 7, 3, POSITIVE); // Set the LCD I2C address
void setup()
{
lcd.begin(16, 2); //Set row and colls of the display
lcd.print("Hello World!");
}
void loop()
{
lcd.setCursor(0,2); //Set the cursor to column 0, line 2
lcd.print(millis()/1000); //Print the number if seconds since the last reset
}
To see, what your code is doing, you have to build your circuit. Do it according to the following scheme:
Download the LiquidCrystal library with your Arduino sketch editor.
Open it, go to the „Sketch“ menu and there on the sub menu „Include Library“. There is an entry called „Manage Libraries…“. With this window you can search and install the „LiquidCrystal“ library.
| ⇐ Lesson #2 | Lesson #4 ⇒ |