In this lesson we’re going to show numbers on a 7-Segment display.
For that do we need:
- 1 Arduino
- 1 Breadboard
- 1 7-Segment display
- 8 220Ω Resistors
- 18 Wires
An array with content will be defined like this:
var_type var_name[size] = {val_0, val_1, val_2, val_n};
e.g.: byte segment[10] = {B100,B010,B0110};
The „B“ before the numbers in the array means, that this number is a byte number, so it only contains 1 and 0.
You use the for-loop like this:
for(init counter; test counter; increment OR decrease counter)
{
//program code
}
For example (do things eight times, from zero to eight):
for(int i = 0; i < 8; i++)
{
//program code
}
That for-loop in a sentence means:
For an int i with 0, while i < 8, increase i plus one, do the program code.
Now we combine these methods in order to show numbers on the 7-Segment display.
//Number coding         0.                 1                2.                3                  4.                 5                  6.                 7                8.                 9
byte segment[10]={B11111101, B01100000, B11011011, B11110010, B01100111, B10110110, B10111111, B11100000, B11111111, B11110110};
void setup()
{
  for (int i=2; i <= 9; i++){ // 2-9 sind Ausgänge
    pinMode(i,OUTPUT);
  }
}

void segmente(byte n) {
// control all 7 segments

  for(int k=2; k <= 9; k++) {
    if((n & B10000000) > 0)
      digitalWrite(k, HIGH);
    else
      digitalWrite(k, LOW);
    n = n << 1;
  }
}

void loop()
{
  for(int j=0; j <= 9; j++) {
    segmente(segment[j]);
    delay(1000);
  }
}
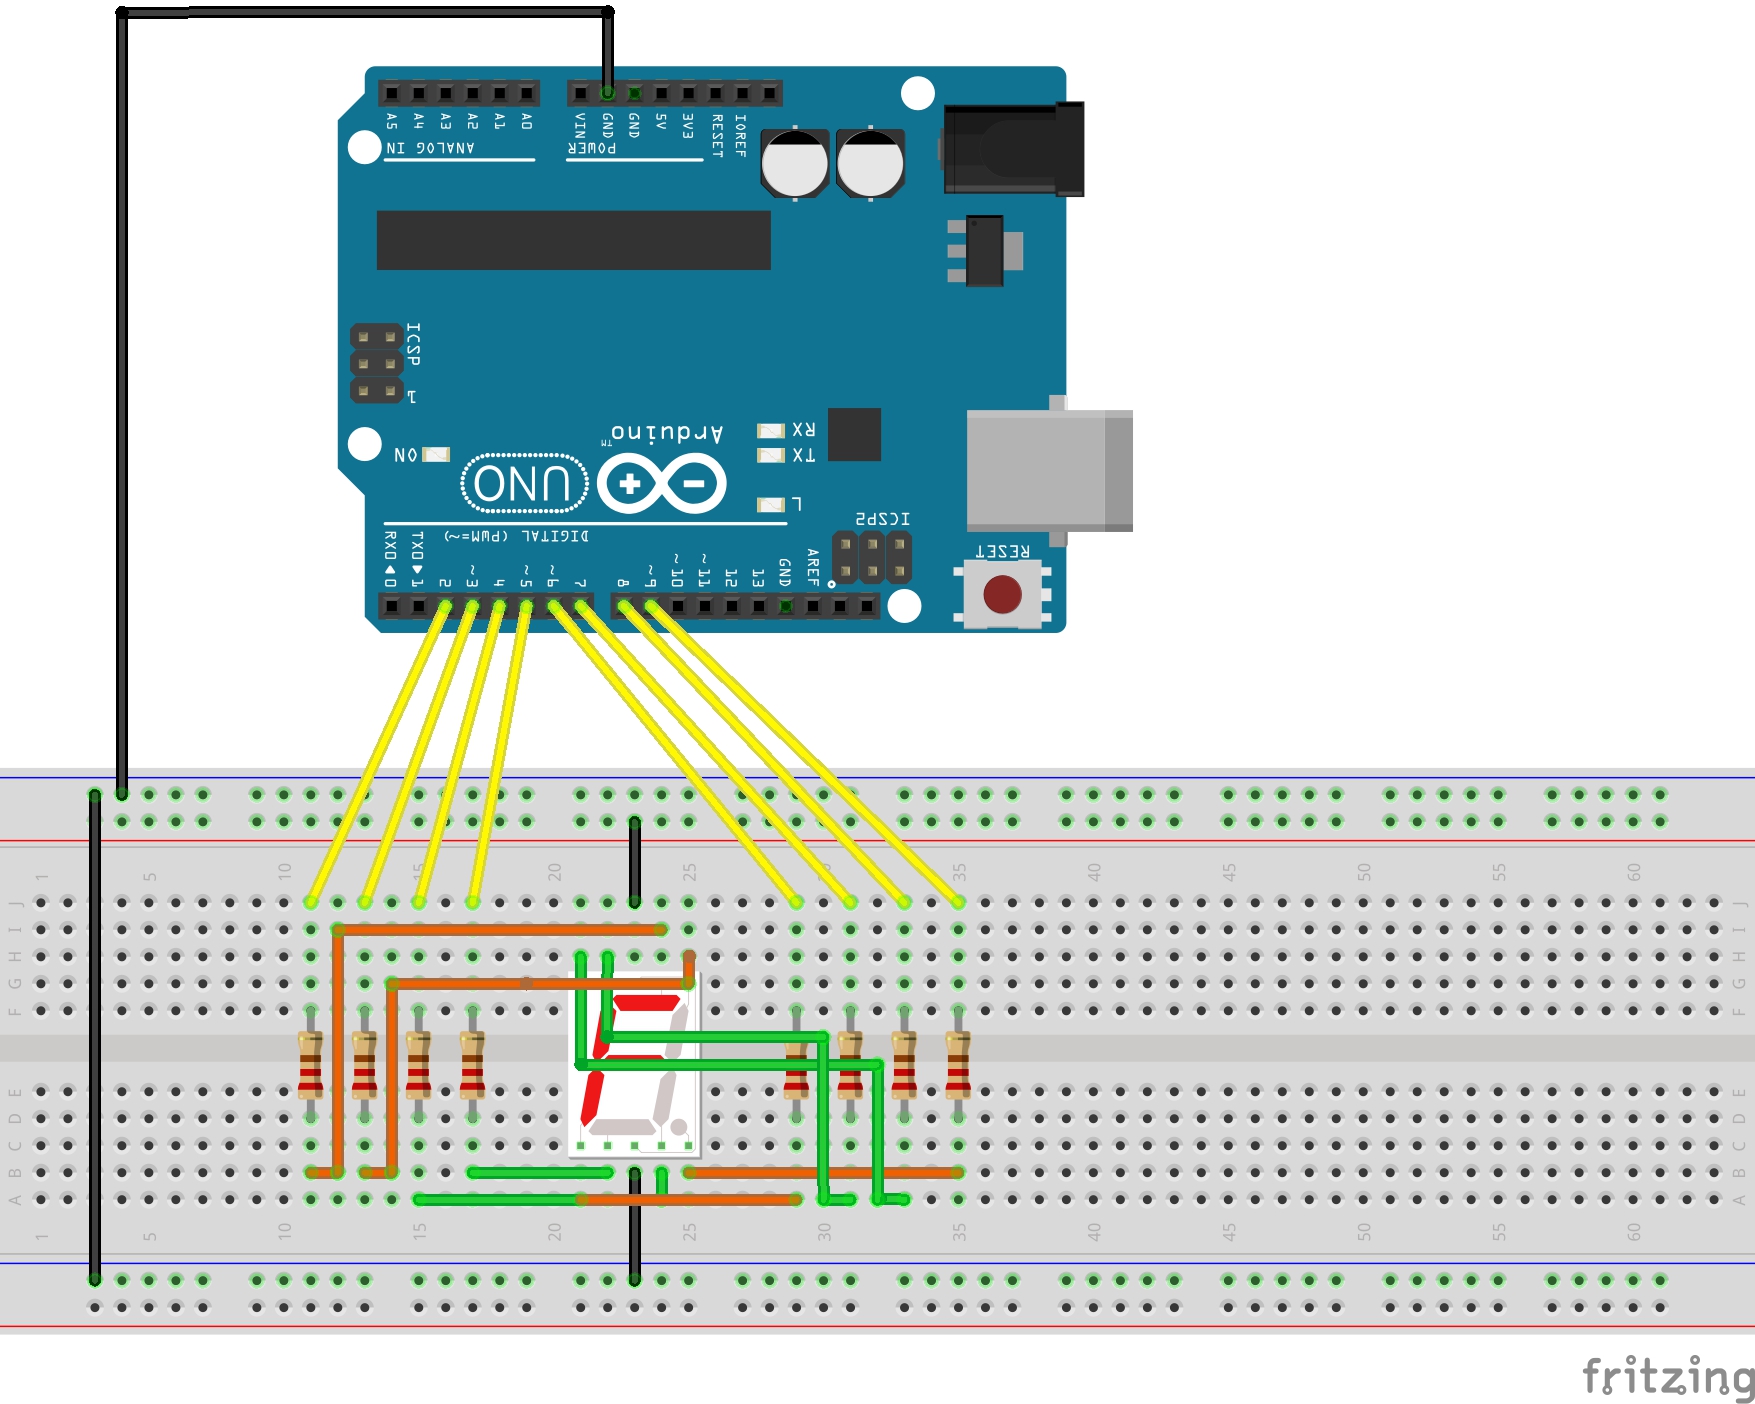
To see, what your code is doing, you have to build your circuit. Do it according to the following scheme:
| ⇐ Lesson #3 | Lesson #5 ⇒ |